
Today, most websites track your online activities by capturing essential information such as IP addresses, cookies, and geolocation. All this information starts associating with the user, and a unique user profile is created over time. This helps the trackers to track the user’s activities over the internet, which in the end results in privacy concerns.
Unlike third-party cookies, there is no straightforward way to opt out of this kind of tracking.
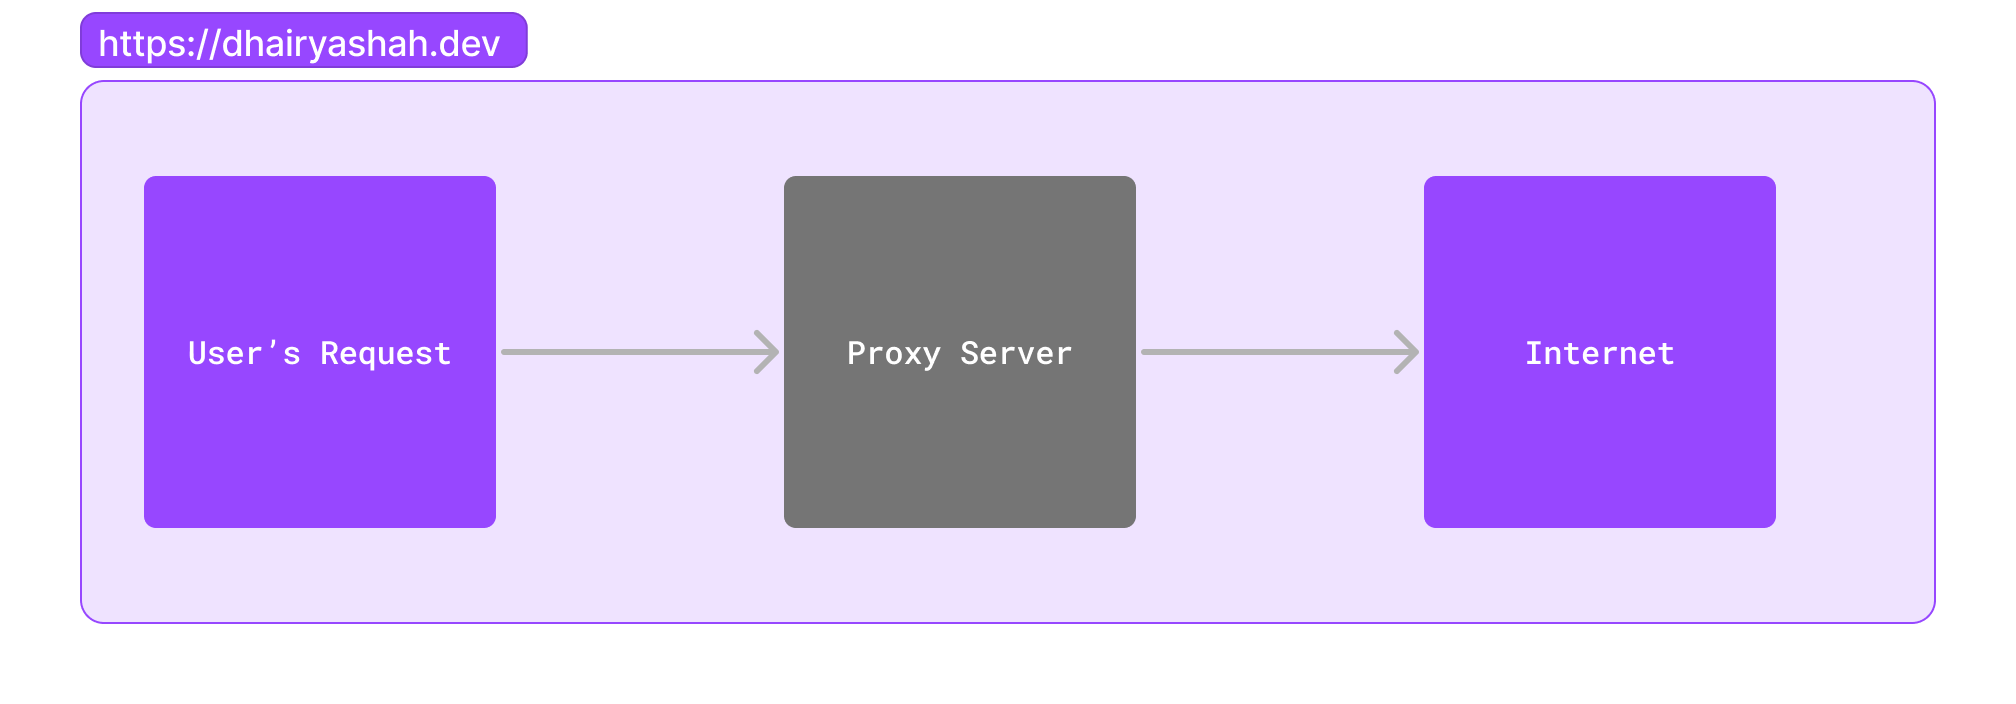
What is a Proxy Server?
A proxy server is an intermediate server that acts as a gateway between the user’s device and the internet. When a user makes a request for a resource, let’s say a website, the request is first sent to the proxy server. The proxy server then forwards the request to the website’s server on behalf of the user.
Benefits of using a Proxy Server
- Privacy Protection: Proxy servers can be used to protect the user’s privacy. They are used to hide the user’s actual IP address from the websites they visit.
- Improved Performance: Proxy servers can be used to cache the requests that are frequently accessed. This helps in faster response and reduces the bandwidth usage.
- Optimal Performance: In a server having large traffic (requests), proxy servers can be used for load balancing. Requests from the users are distributed across multiple servers to provide optimal performance and prevent the single server from being overloaded by the huge traffic.
- Enhanced Security: As we discussed earlier, the proxy server provides an additional layer of security by acting as the middleman between the user’s device and the internet. They can filter out the malicious content and block certain types of attacks.
Proxy servers can be operated at different OSI models, including the HTTP proxies, transport proxies (SOCKS proxies), or even the lower layers.
So, how to make our proxy server?
Prerequisites
- Any cloud service provider account. (DigitalOcean Recommended)
- One Ubuntu 20.04 or later server, with at least 512MB of RAM.
Create an Ubuntu Server
In this tutorial, I will be using DigitalOcean to host my VPS.
Create an account on DigitalOcean, if you haven’t done so yet.
Use my referral link to create an account on DigitalOcean to get $200 worth of credits for 60 days.
Now create a new project.
In the sidebar click New Project:
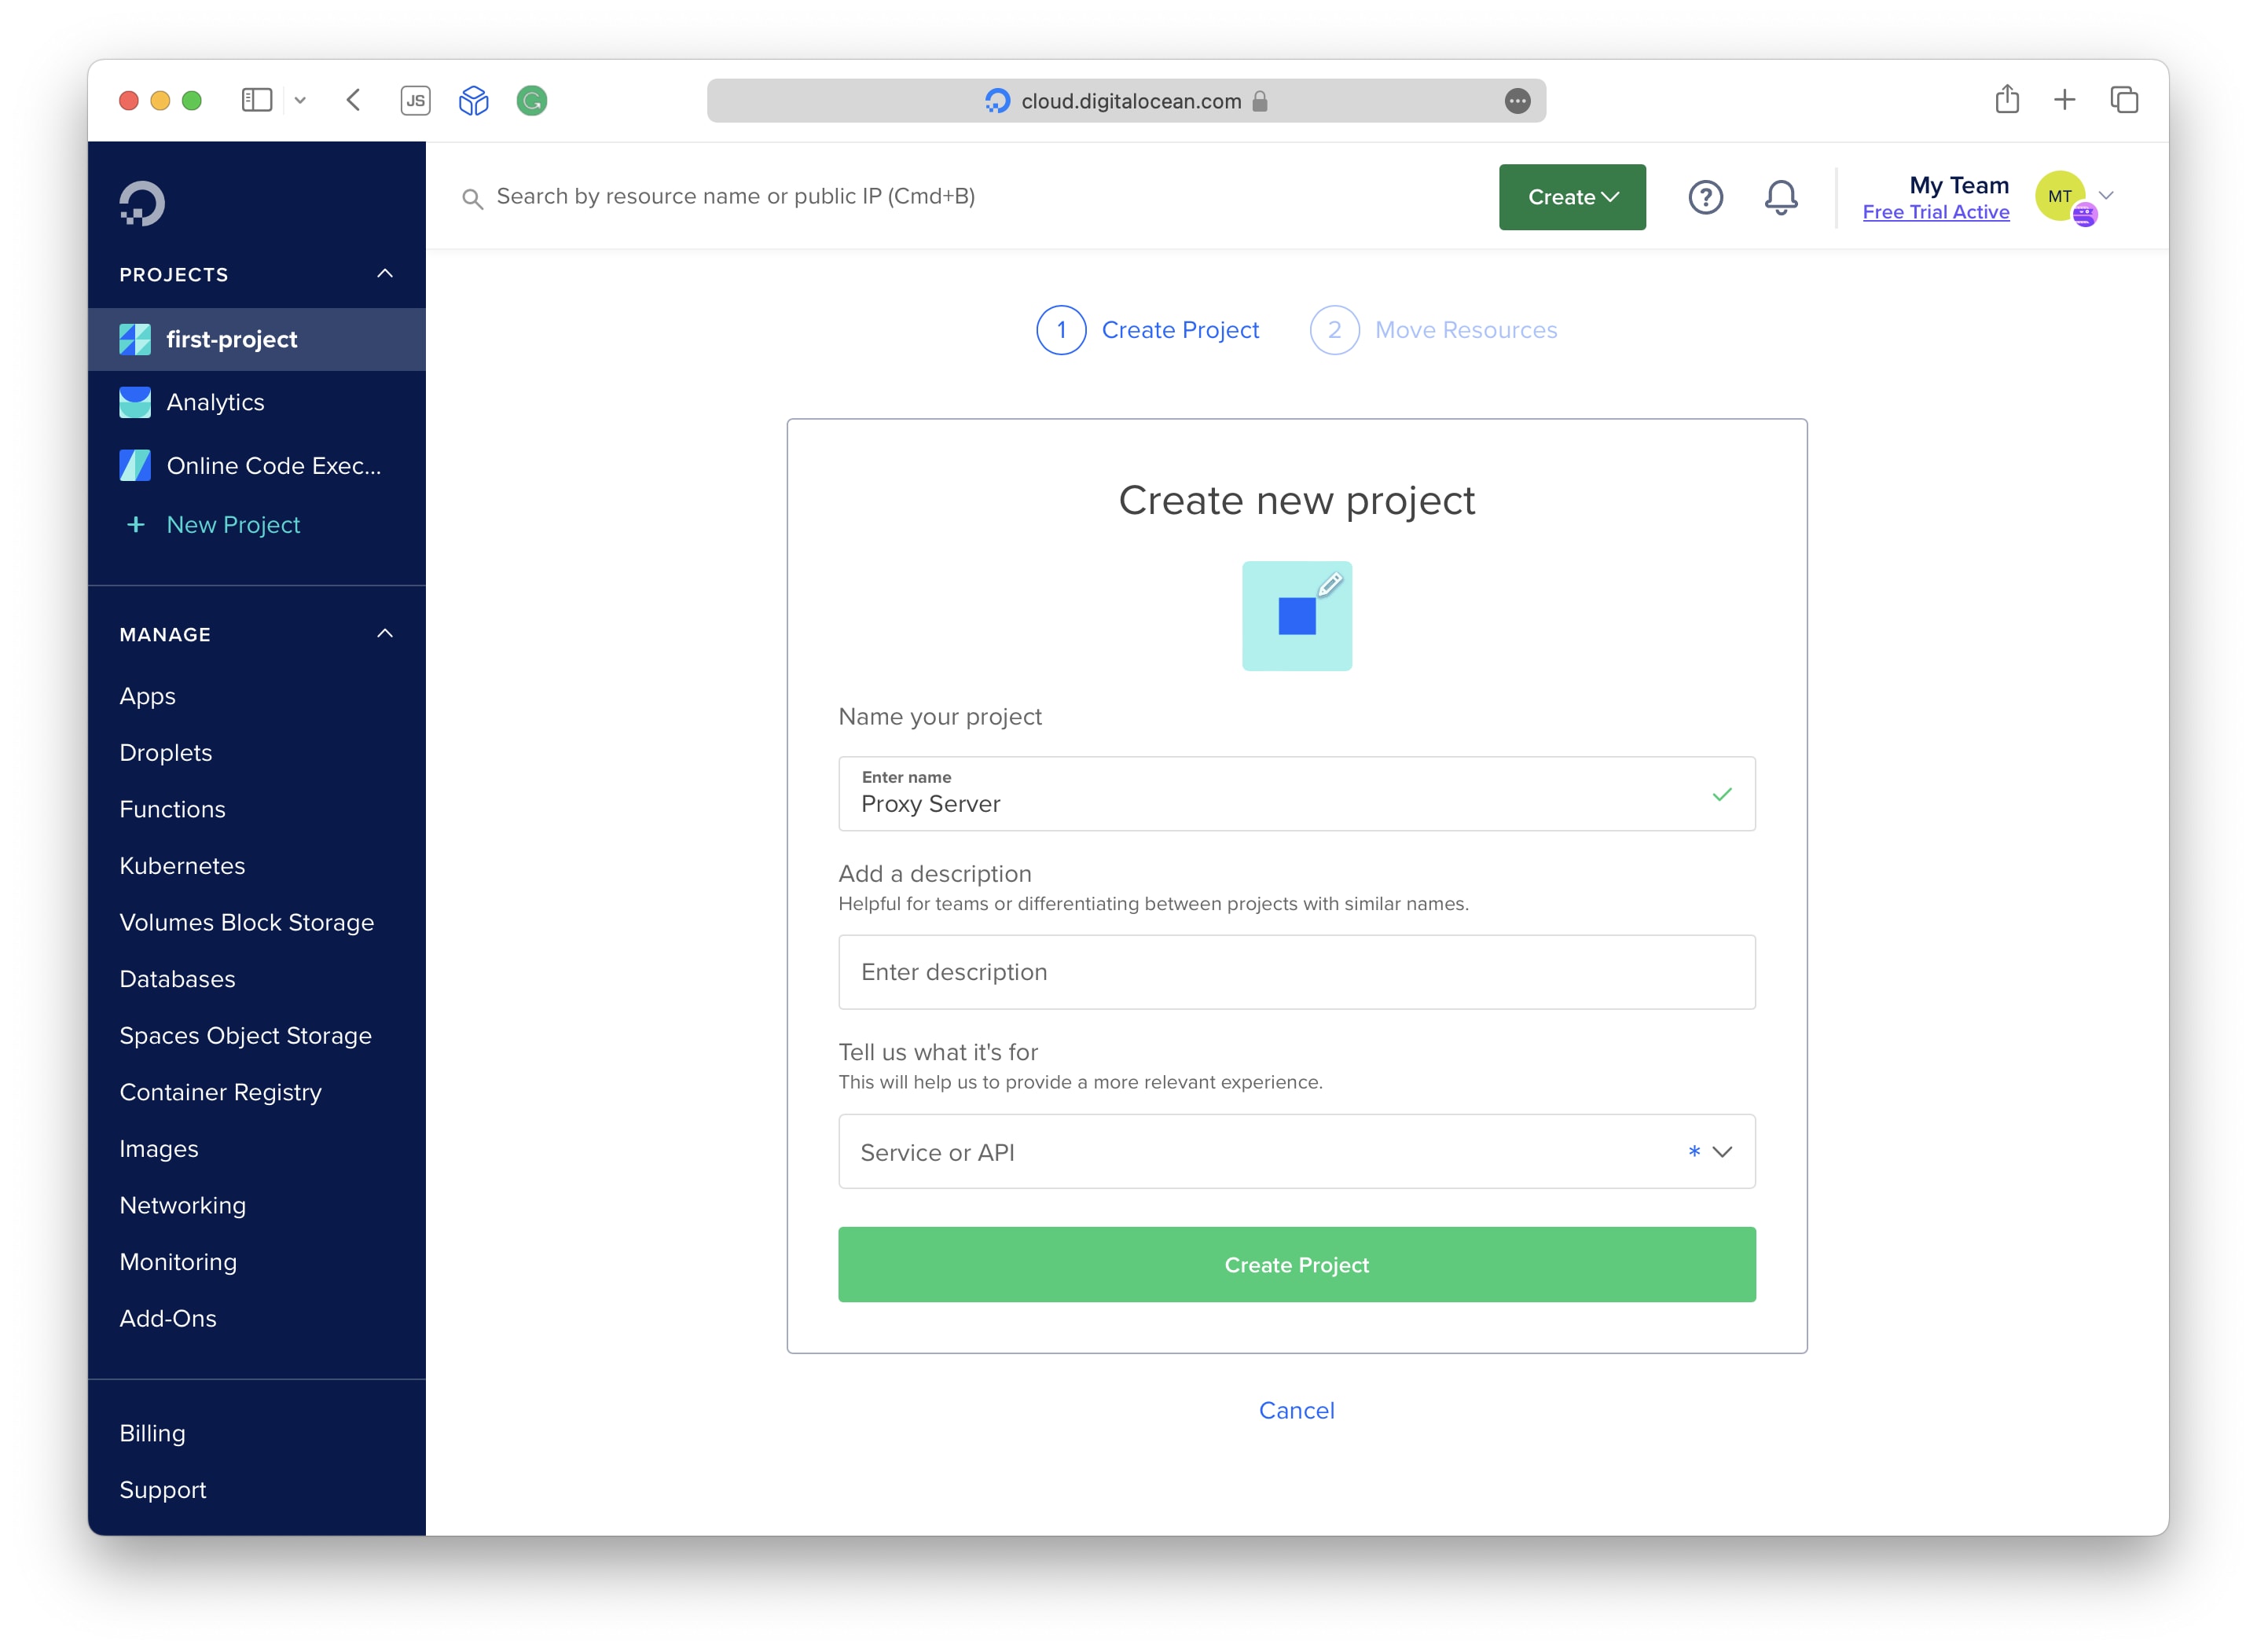
Enter a name, for example, “Proxy Server”.
Choose something in the “Tell us what it’s for” box, or you can’t create the project. Then click Create Project.
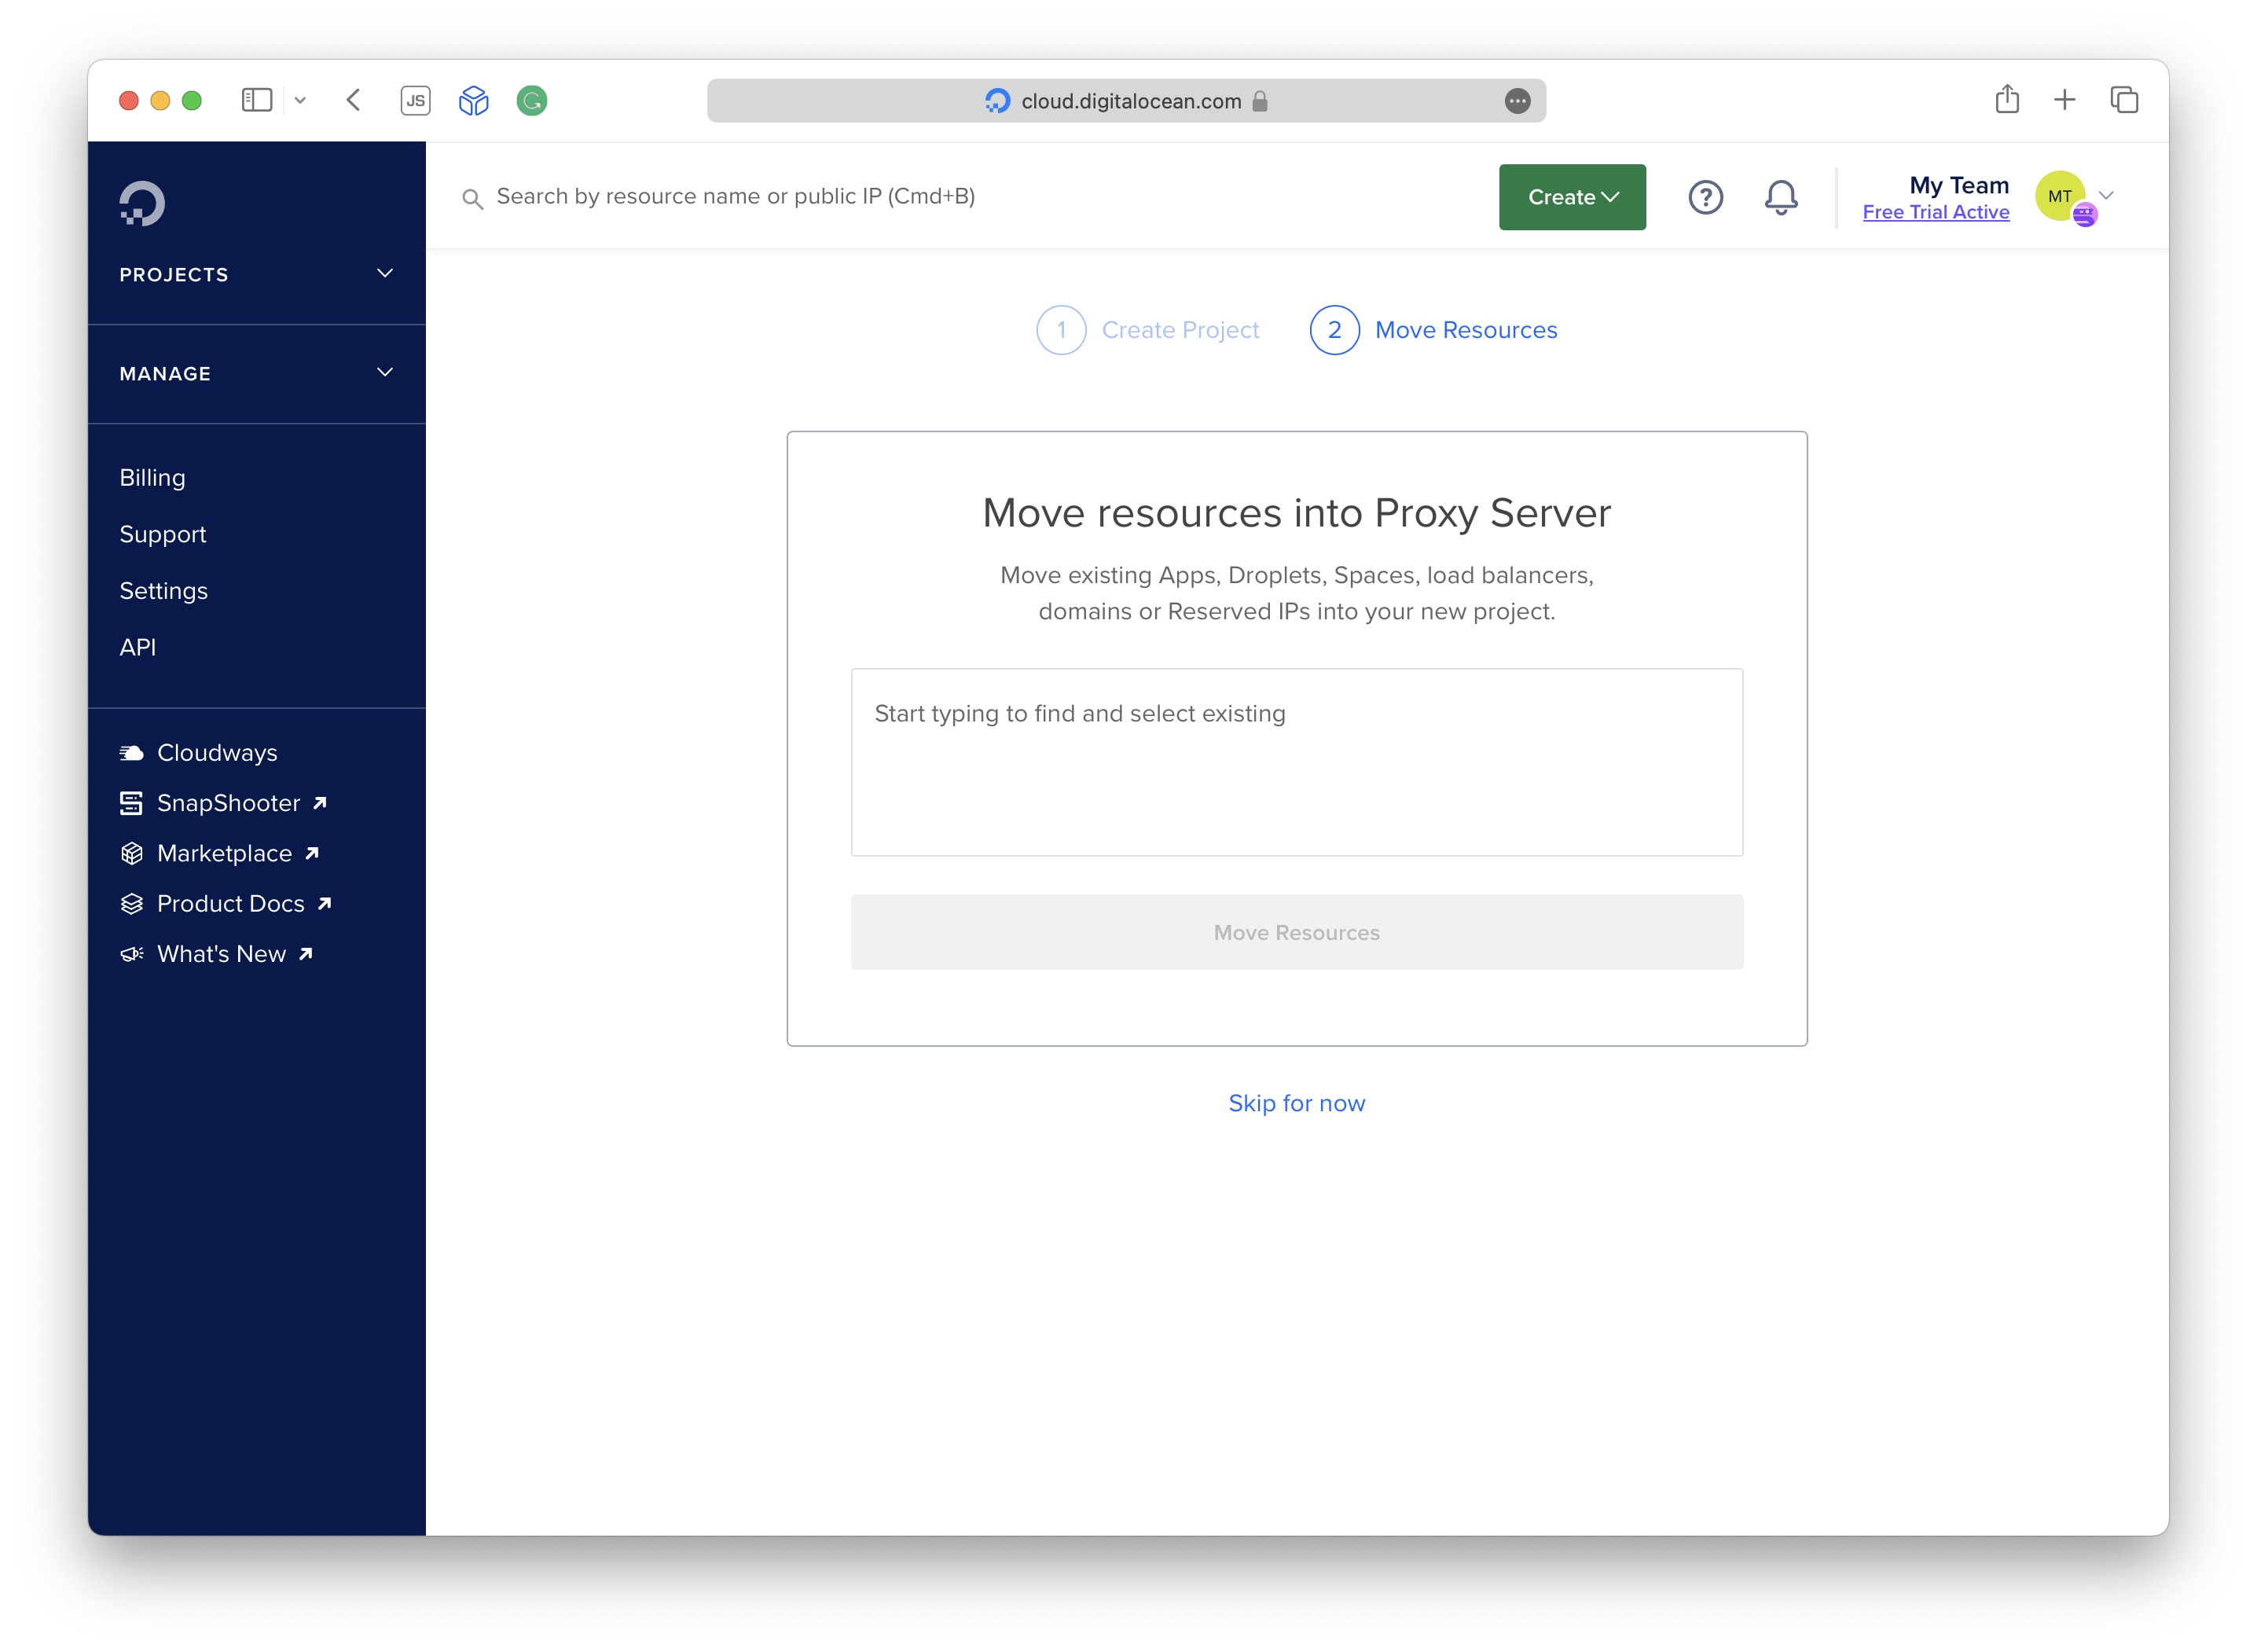
In the next page, click “Skip for now”
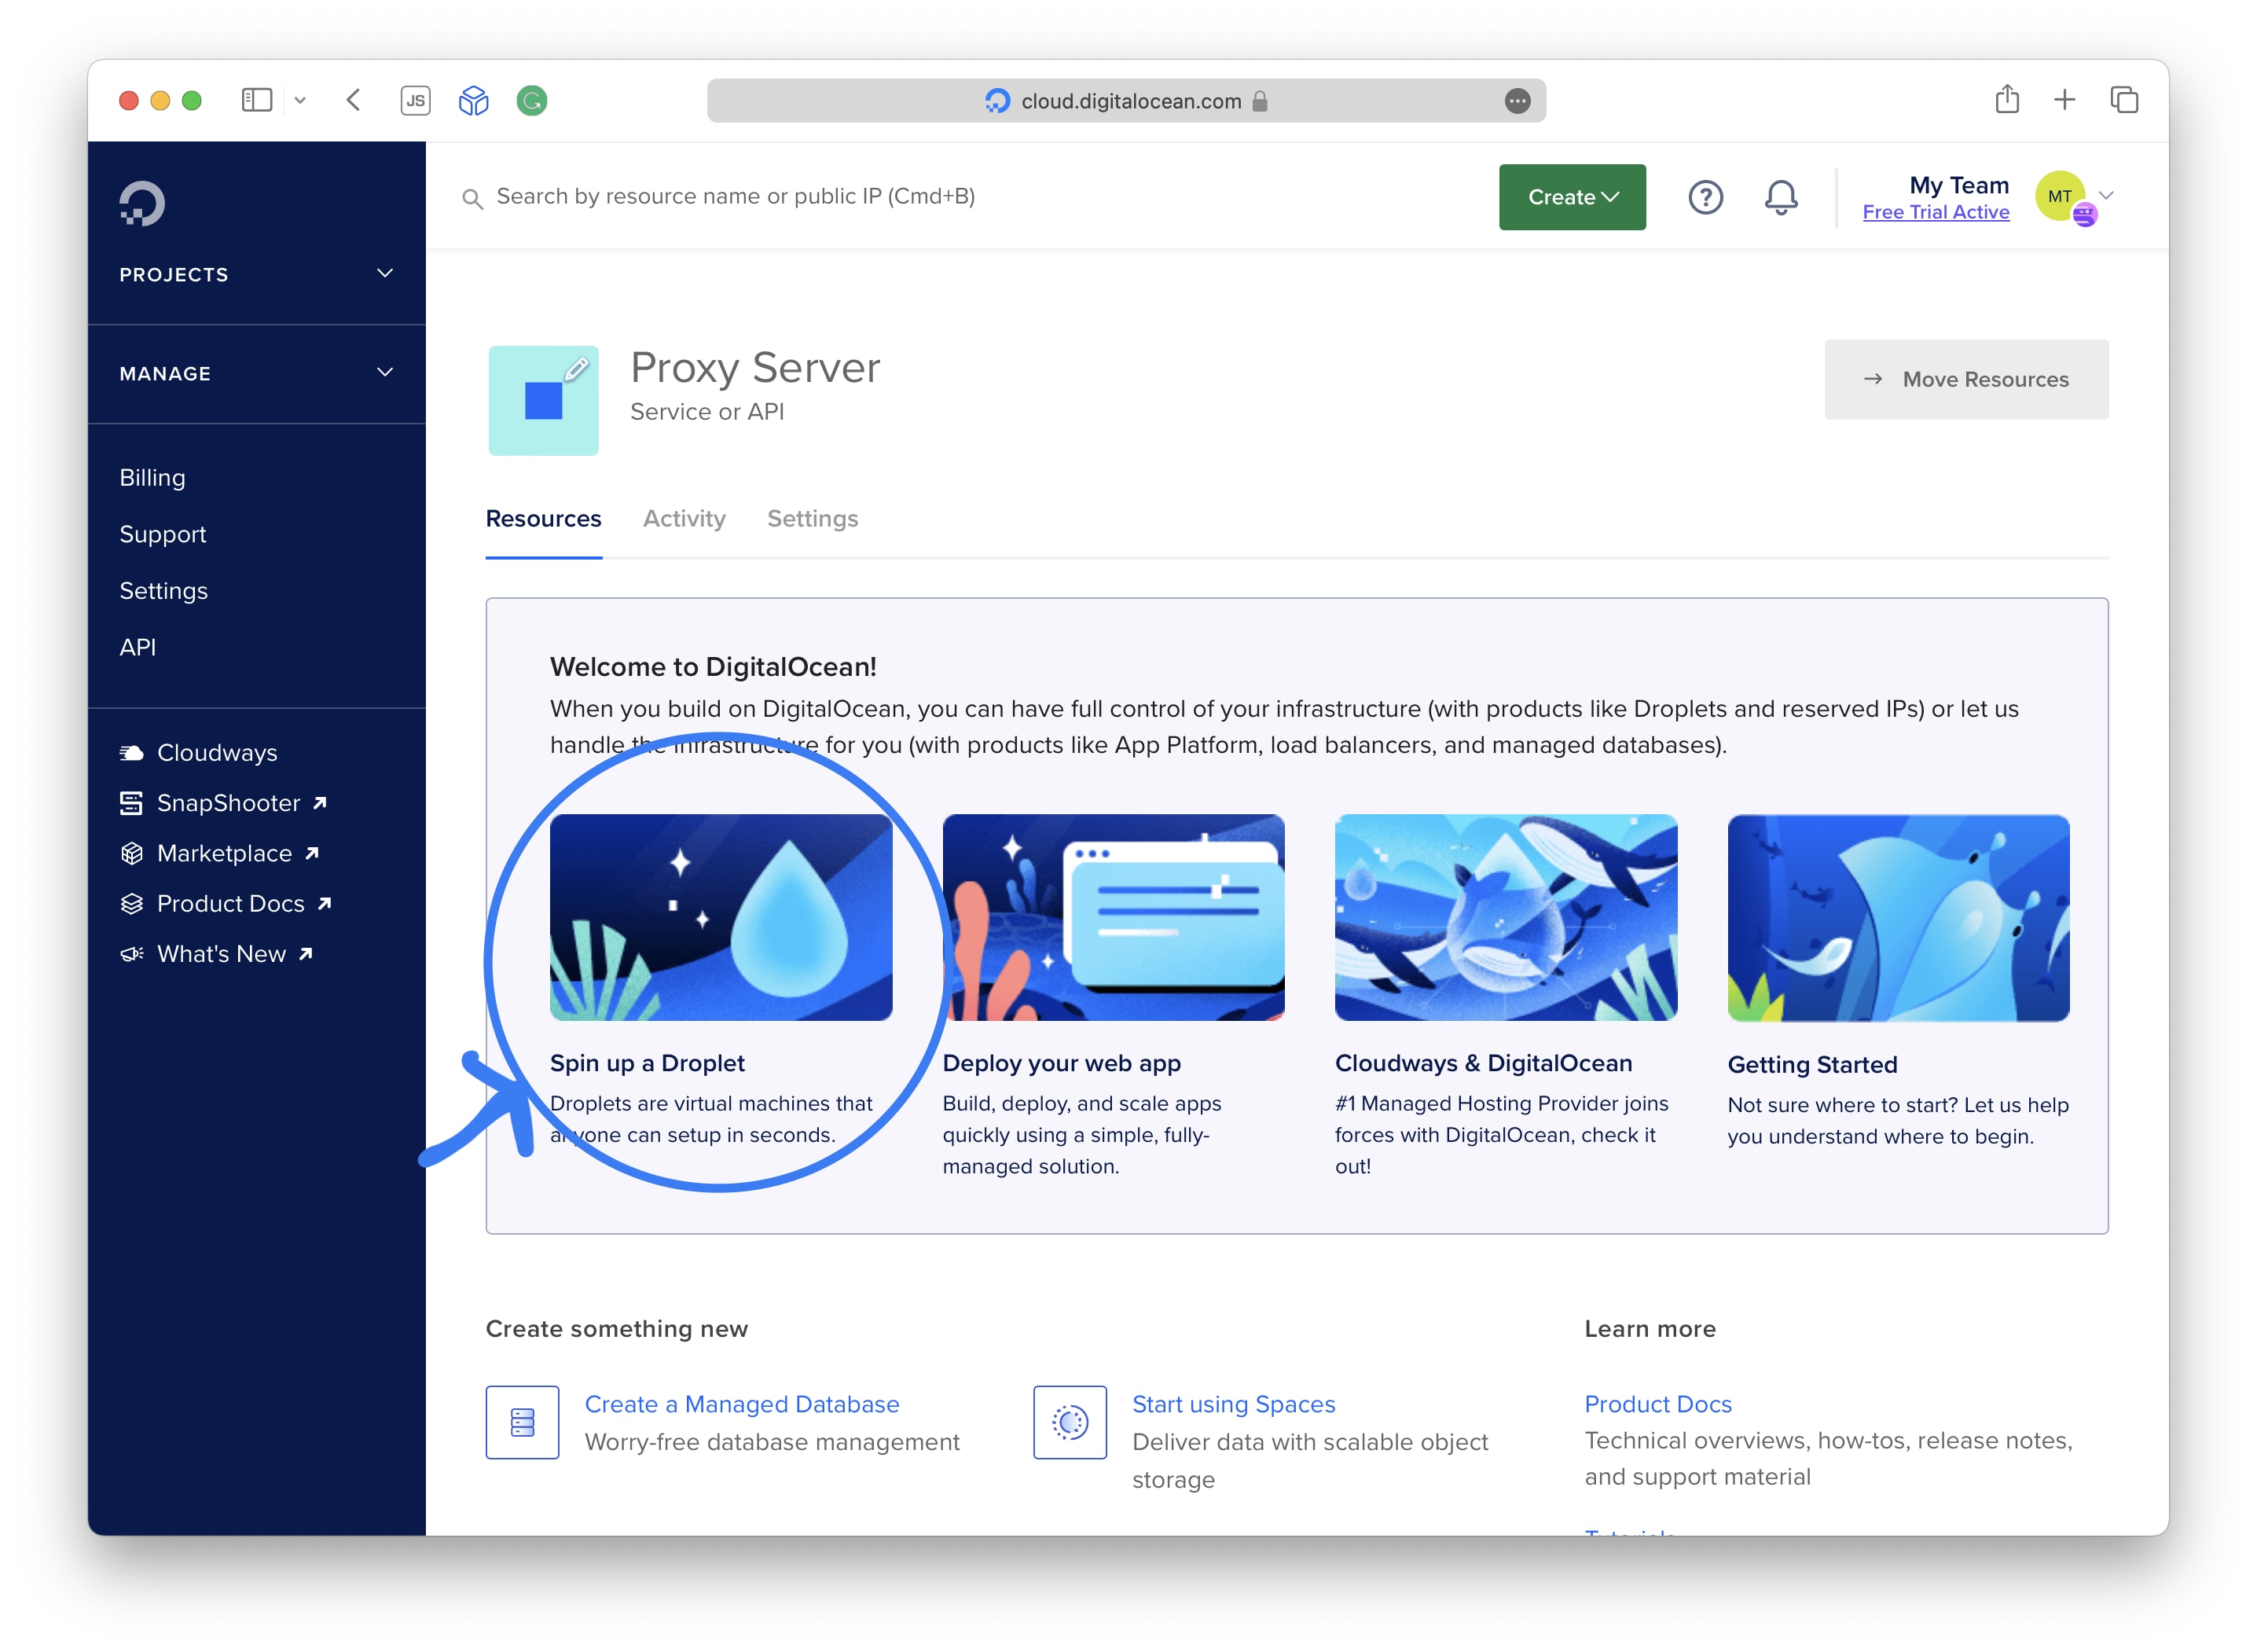
The project has now been created.
Now, click on Spin up a Droplet to create a VPS (Virtual Private Server).
This shows the interface for creating a new droplet.
Choose a region where you want your internet activity to be routed through the proxy.
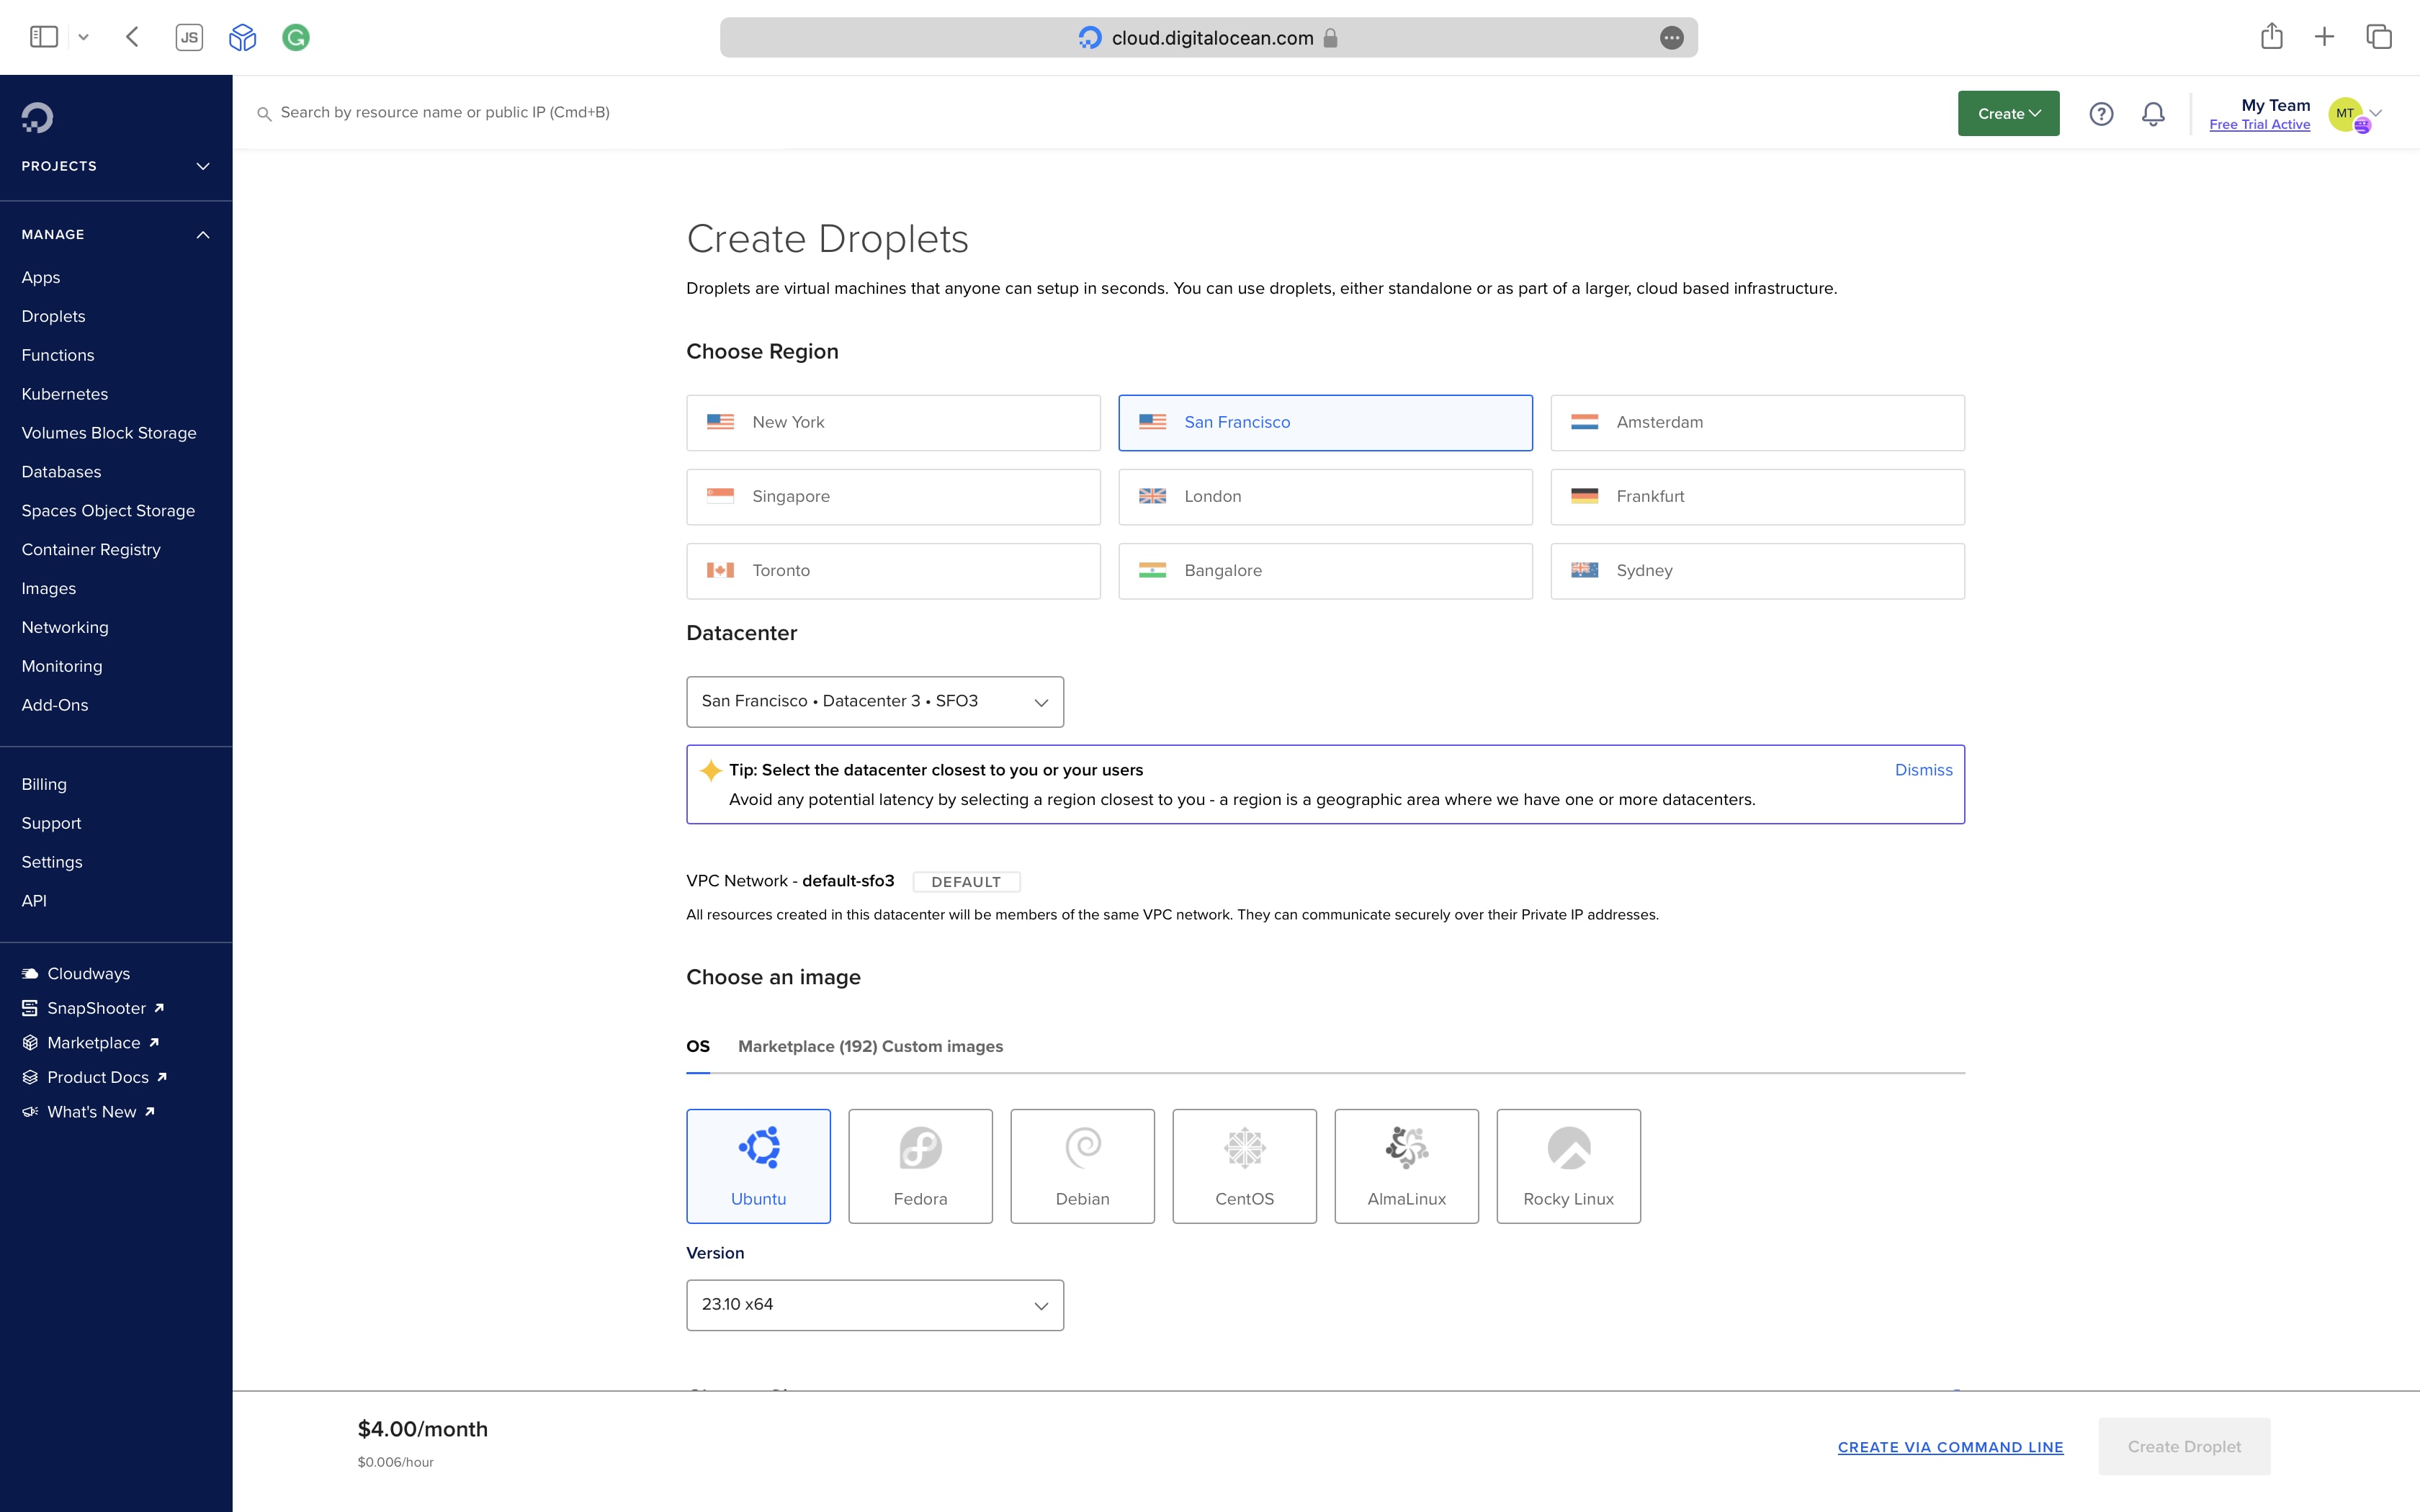
To initiate the installation of Ubuntu on your Droplet, simply pick the Ubuntu option from the ‘Choose an image’ section.
Now, choose the droplet size. The default selection is the ‘Premium Intel/AMD’ CPUs, but for our current needs, we don’t require that level of power. Instead, opt for the ‘Regular’ CPU option, which comes with a $4 per month plan. Note that in certain regions, the $4 per month plan may not be accessible, so in such cases, pick the most economical plan offered in that region.

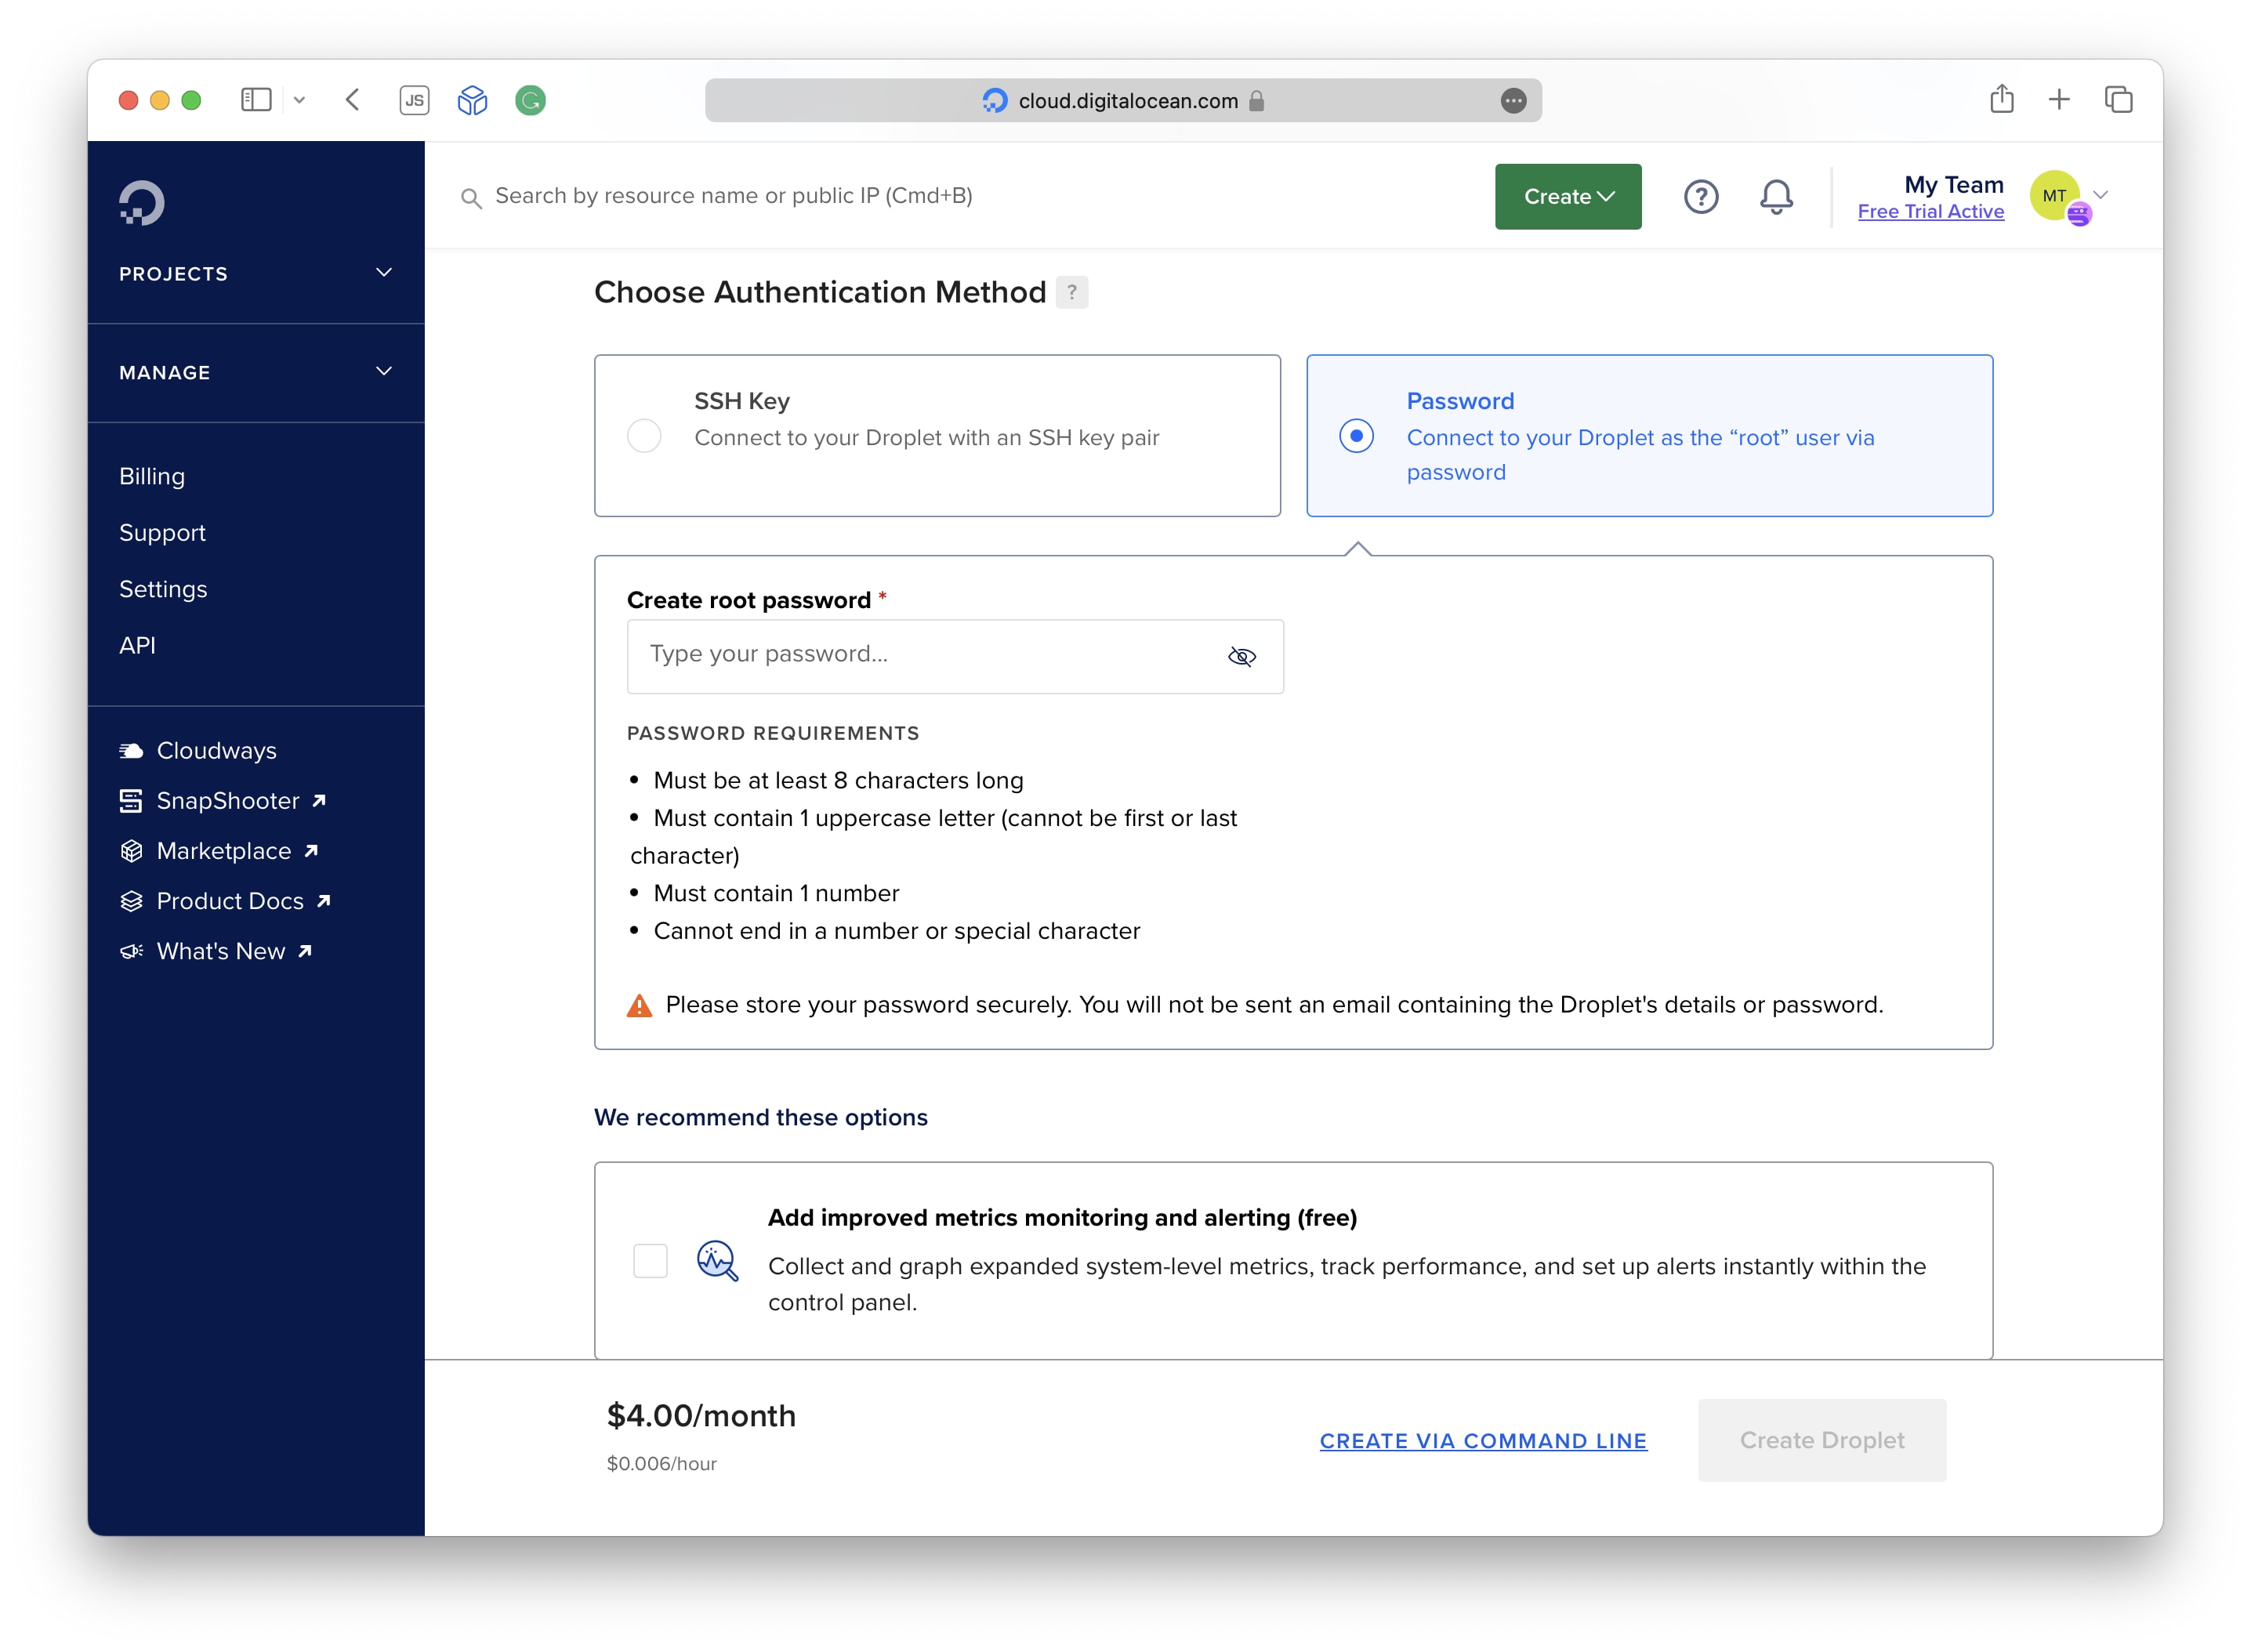
Now go down below, and set up a strong root user password.
Finally, create the Droplet.
It may take some time to boot the server. Once the server starts running, copy the IPv4 address.
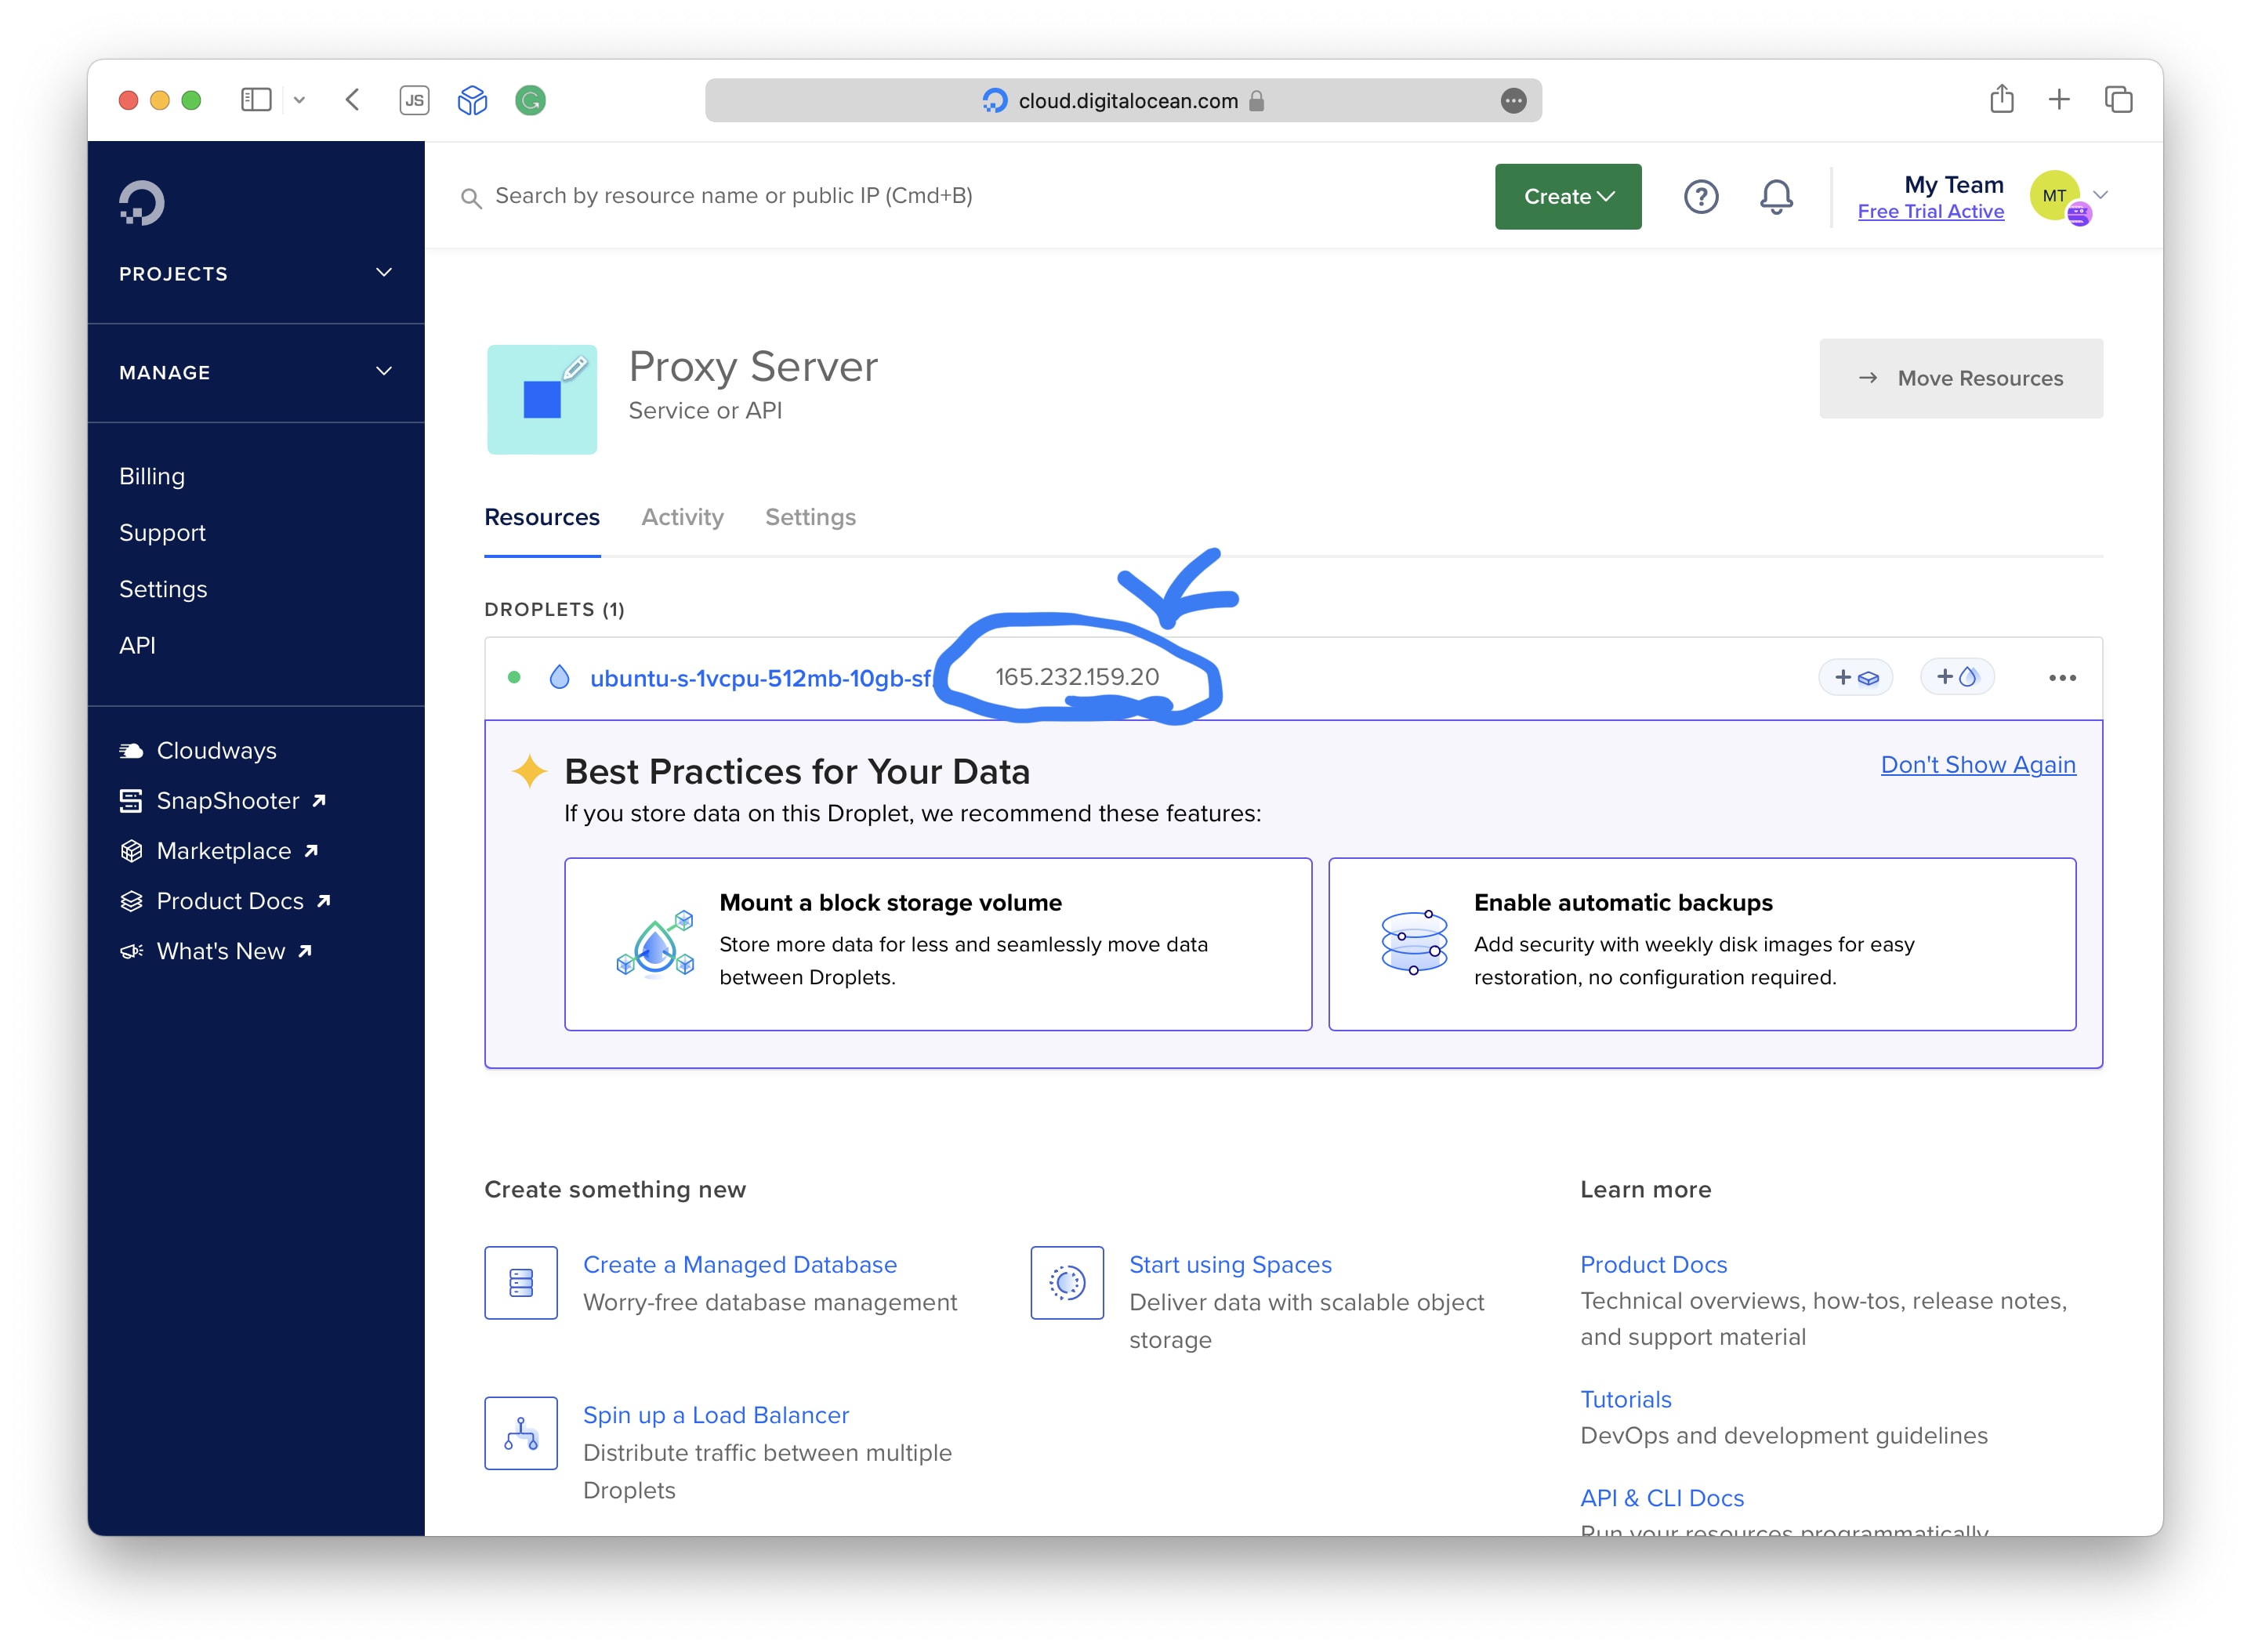
Now, we have successfully configured our server setup.
Configuring the Server
Open the terminal, and login to your Ubuntu server using openssh.
ssh root@YOUR_SERVER_IPV4After you log into your Ubuntu server. Install openssh-server.
apt install openssh-serverOnce you have finished installing, log out from the server.
exitSetting up the proxy locally
On your local machine, open the terminal and run the following command,
ssh -D 2402 -N -C root@YOUR_SERVER_IPV4Now open the Firefox browser, and open the settings. In settings, search for the “Proxy”.
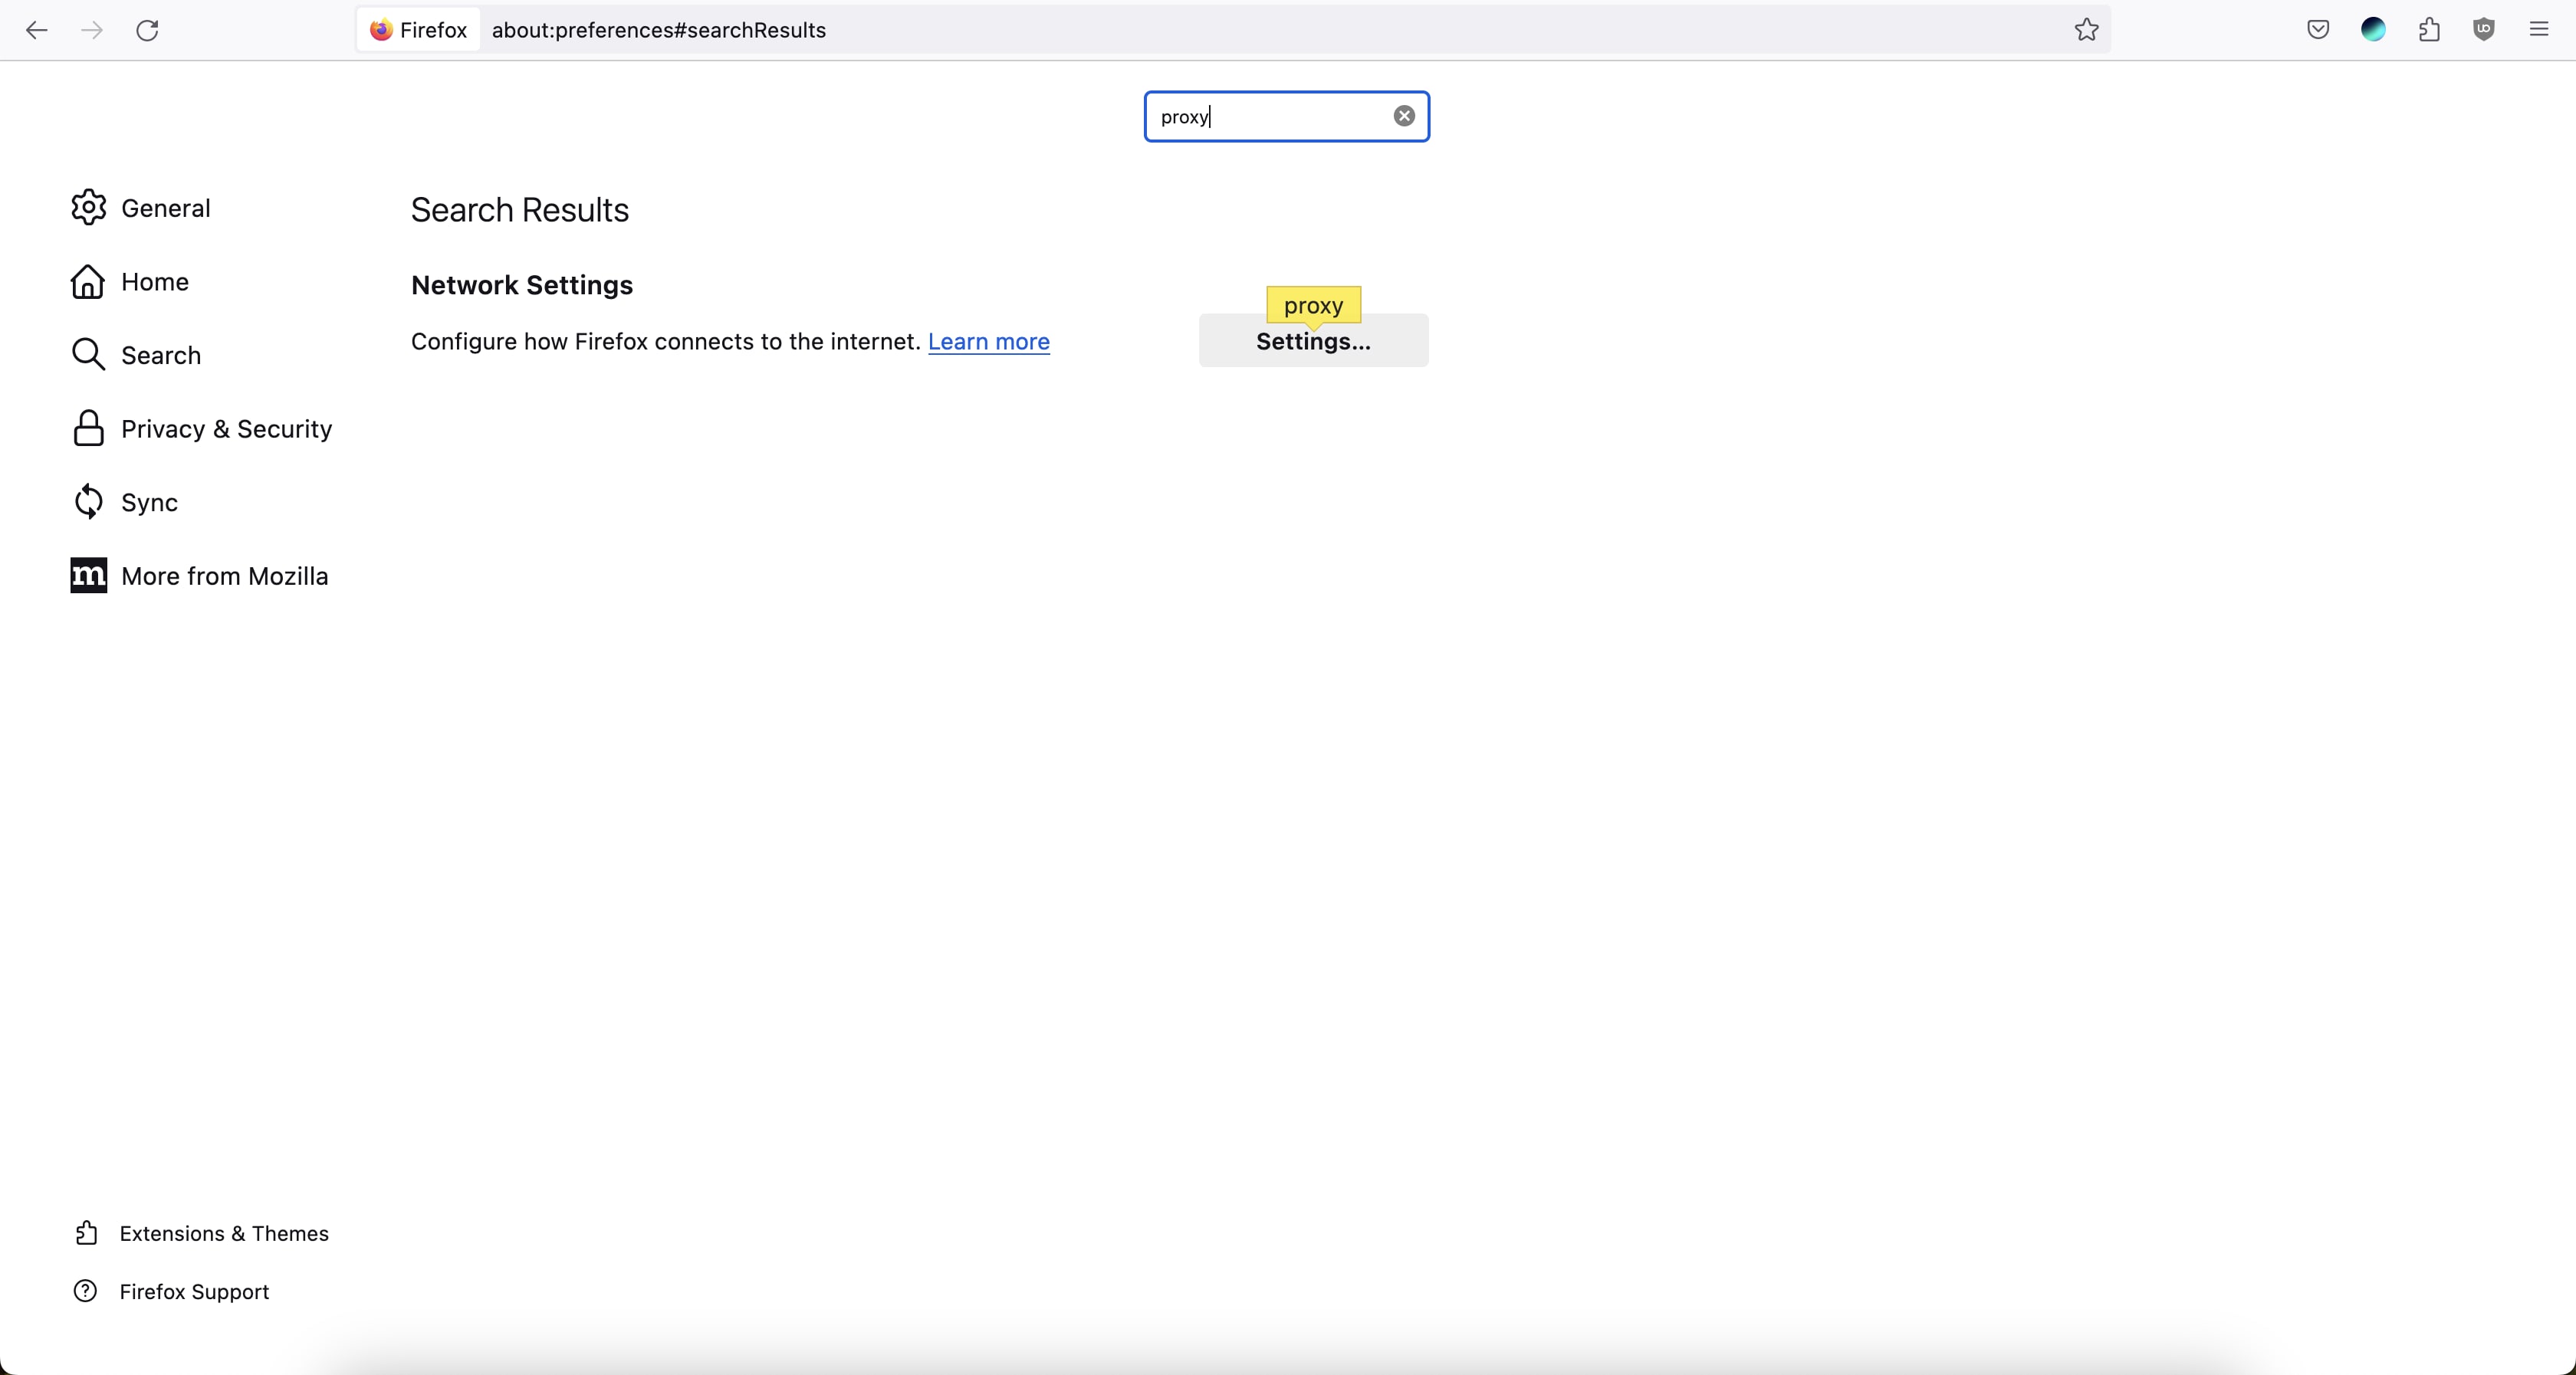
Now click on the “Settings”,
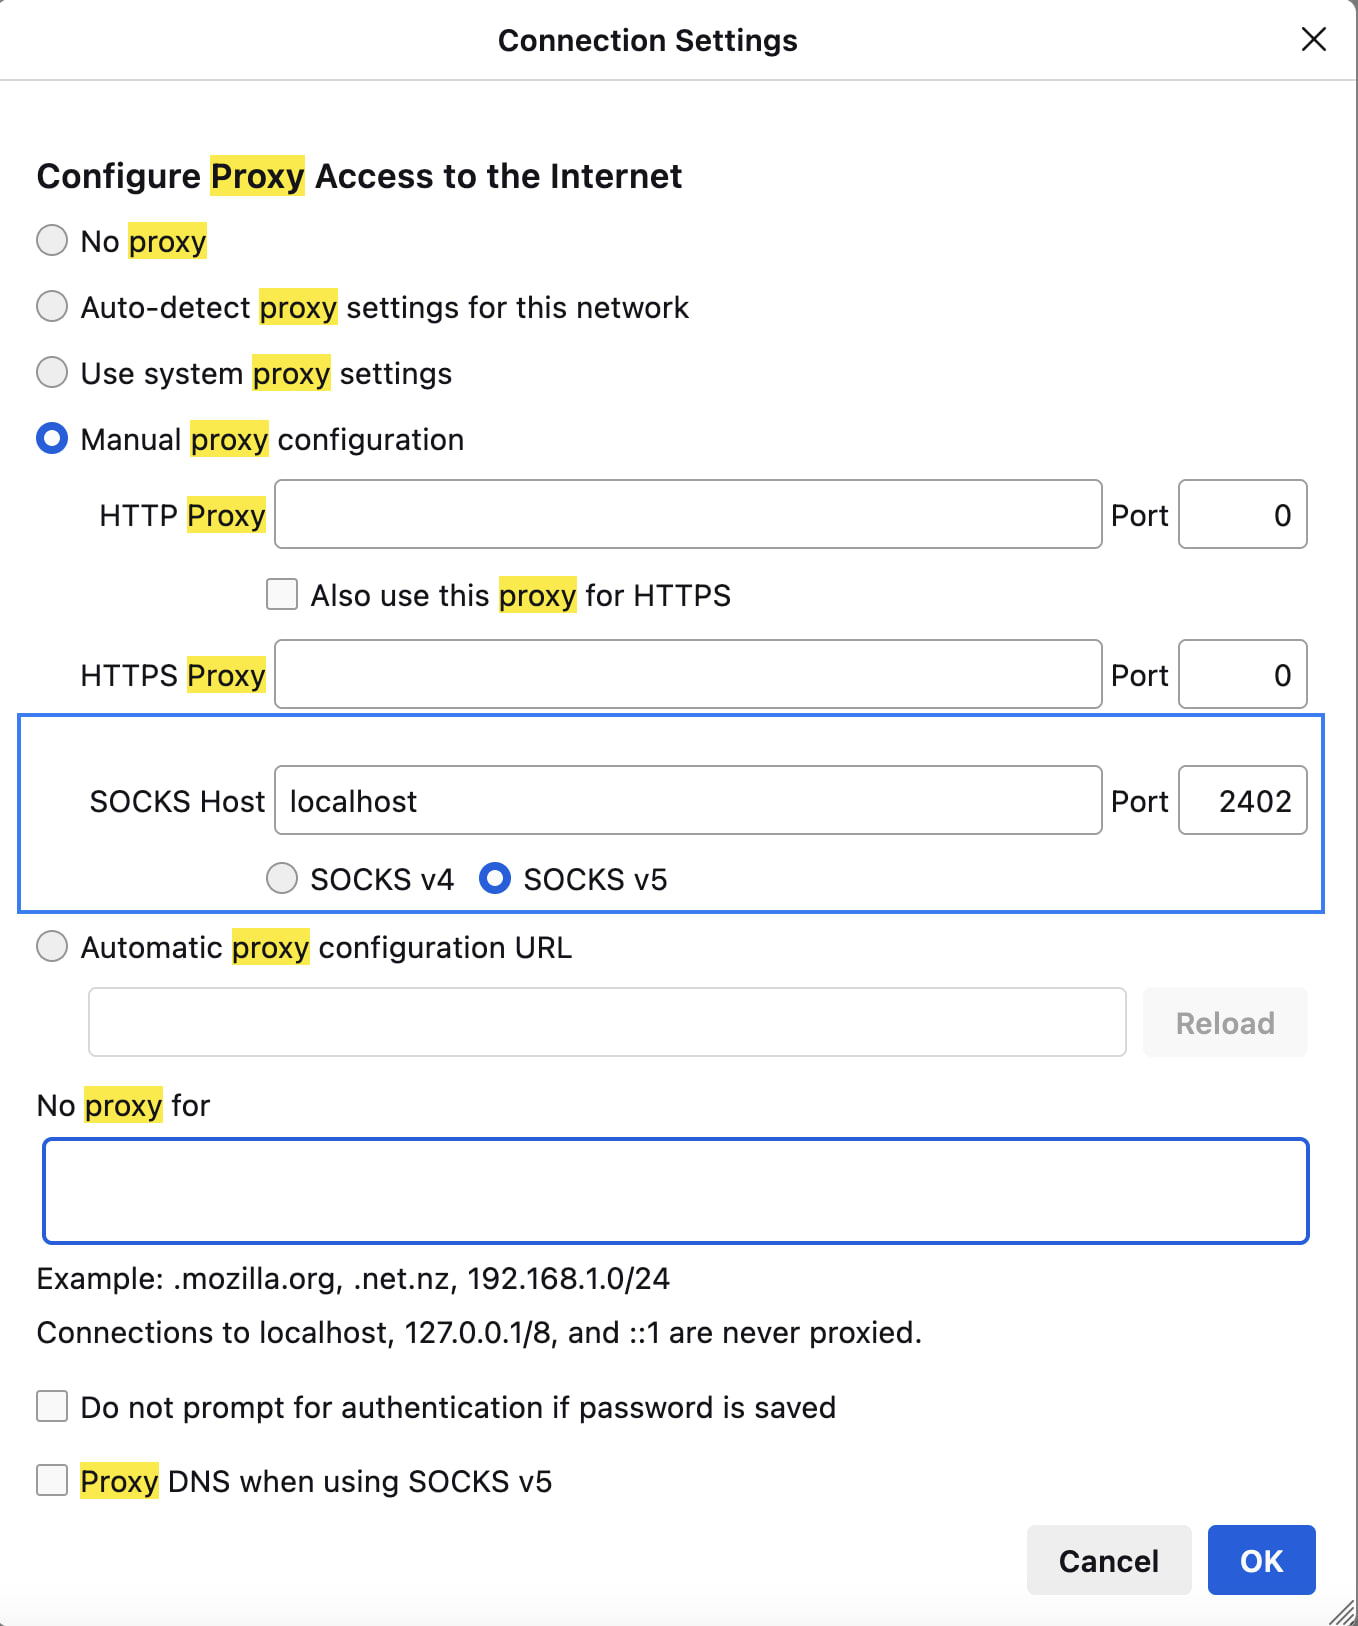
Choose, the “Manual Proxy Configuration”, and enter the details in the SOCKS Host input field as shown in the above image.
localhost | PORT: 2402
Now click on OK, and you have successfully configured the proxy.
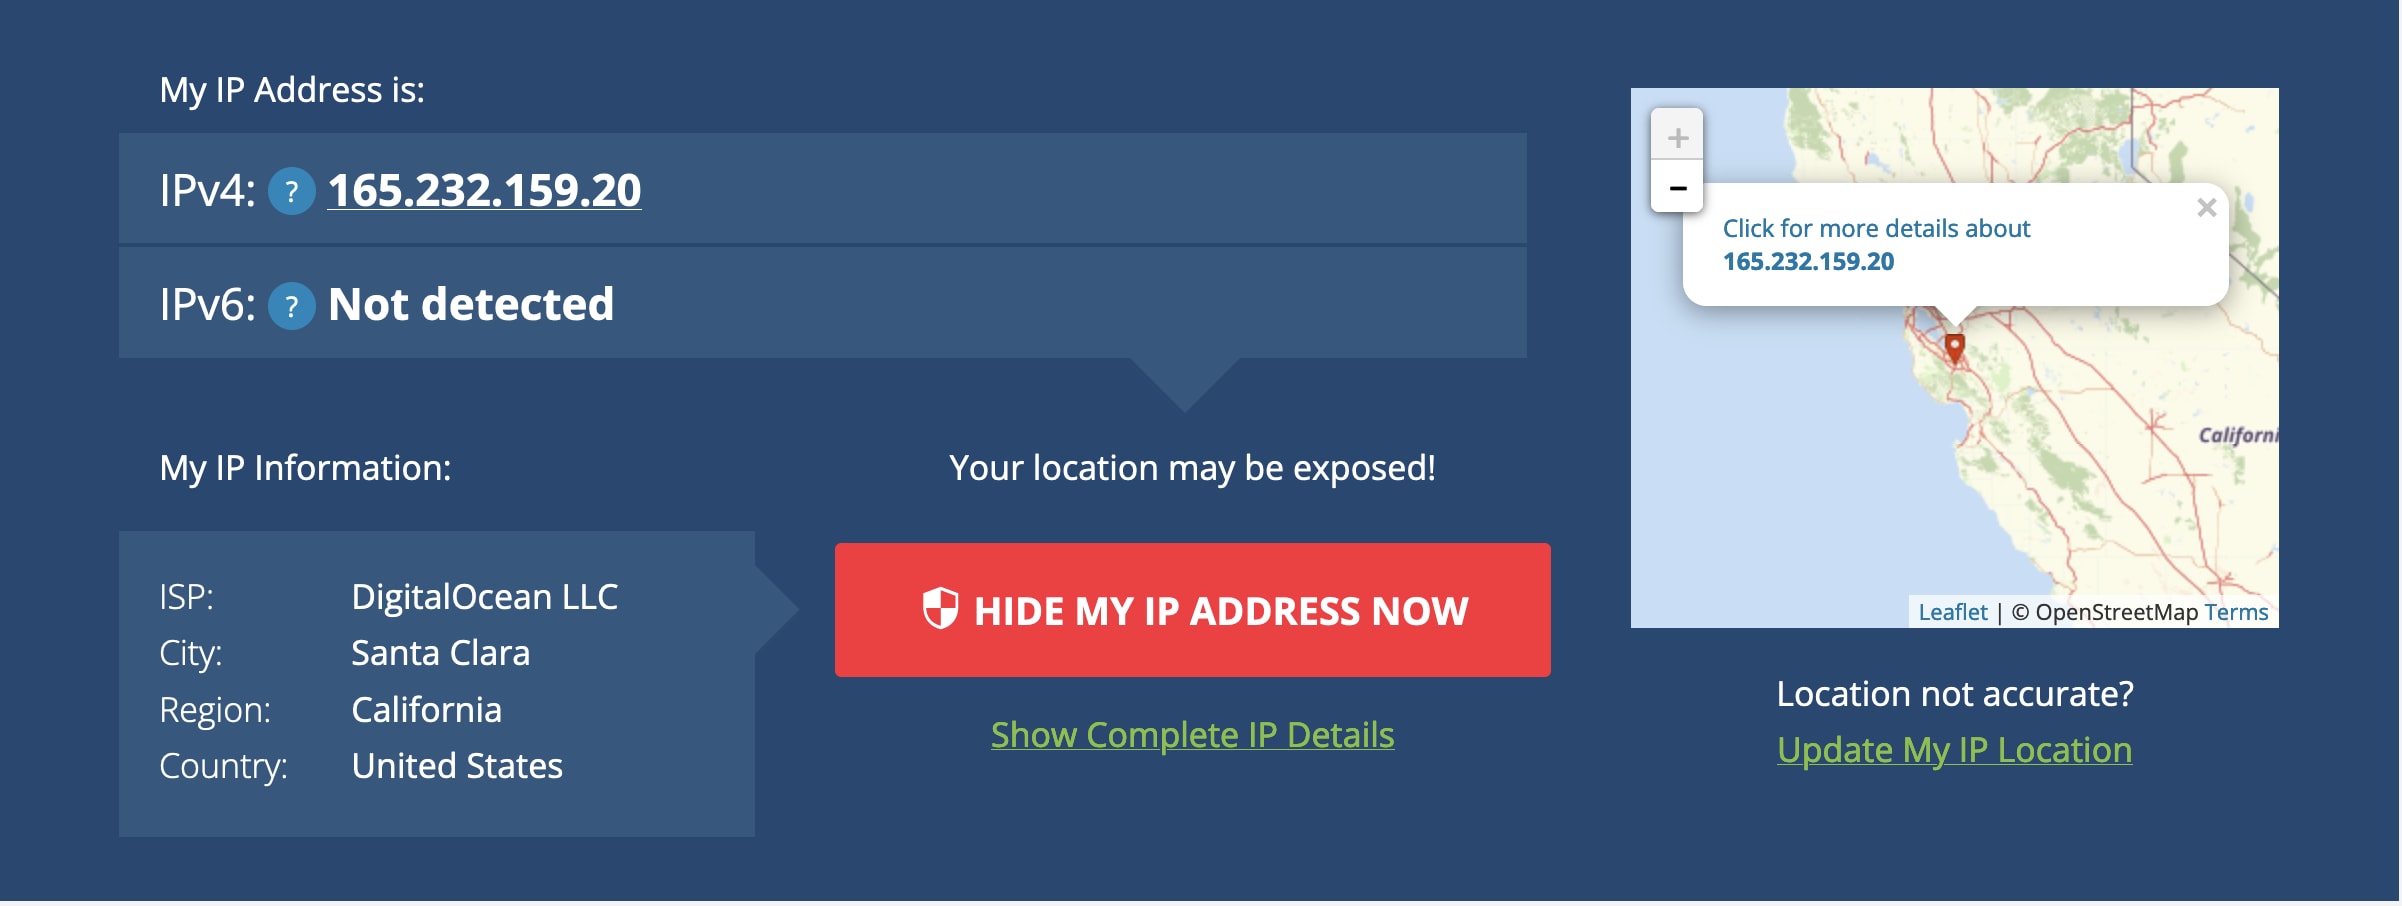
Testing the proxy server
Before connecting to the proxy server:

After connecting to the proxy server:
Conclusion
So, this is how we can set up a proxy server on our own, and protect our privacy, and maintain anonymity online.
I hope this article, was helpful to you. Thanks for reading!